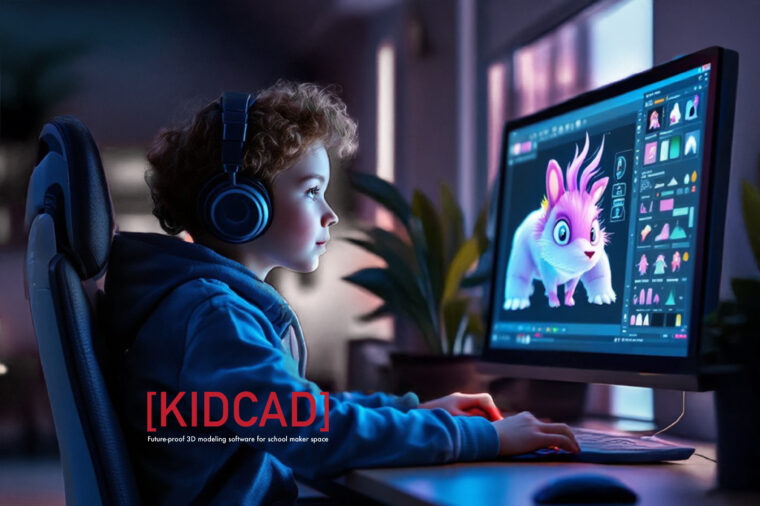
*Project Title Image was generated using Flux 1.1 pro and edited with Adobe Photoshop 2025 with the prompts: “A 9-year-old gender-neutral child sitting in front of a futuristic computer using future-proven 3D modeling software to create their own cartoon animal character design.” and “Make the room futuristic, spacious, with more natural light, with plants” respectively.
A learning software design that aligns with student-centered pedagogy
The project KIDCAD imagines a futuristic world in which generative AI is widely incorporated daily to ease human workflow. The project envisions a futuristic 3D modeling software called KIDCAD, integrated with generative AI to assist children in designing their 3D characters. ‘KID’ represents children, and ‘CAD’ stands for computer-aided design. To design a maker space learning software that aligns with the student-centered pedagogy, a study of a user journey is employed in the development process. Therefore, the project also created a STEAM learning activity for Grades 4-6 students using KIDCAD with such visions. The project aims to help children develop the correct mindset of using generative AI to assist their work. In the meantime, it allows children to develop their visual-spatial thinking ability through working together with the AI.

*The above character was generated using Flux 1.1 pro with the prompt: “An “American School animal cute character” on a “2D grid plan “of a “3D software” with multiple views.” The image was later edited manually in Photoshop to adjust the proportions of the fur.
“A sculptural object, it has such variety in it but yet such strength – torsion. And it has the turn, and it has completely different views from all around. It’s an example of what I like in sculpture of a form that you can’t really know exactly. From here, if I’d only shown this view, I couldn’t possibly know what it was going to be like from that view. And yet, it’s the same object.”
– Henry Moore
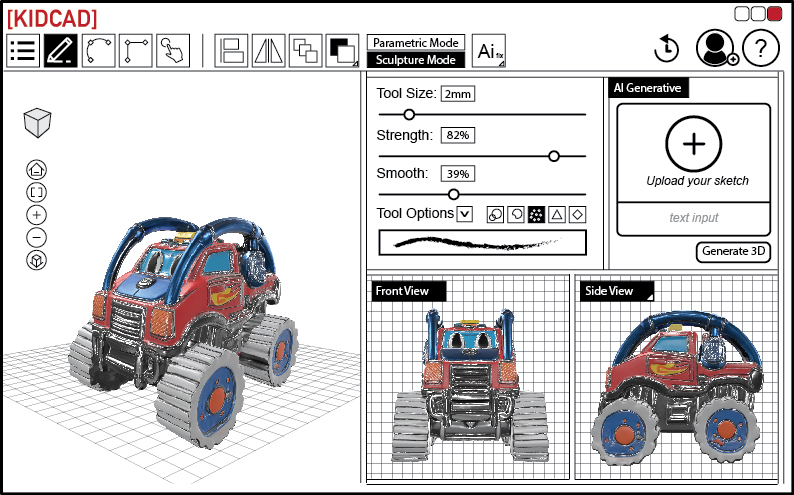
The above image is a mockup of KIDCAD 3D modeling software, highlighting the Generative AI feature by uploading the hand sketch drawing directly. On the left of the Generative AI feature window is a set of controls in which the user can adjust the properties of the magic sculpting pen. Users can use this magic sculpting pen to modify the generated 3D models to the desired shape that the user intended to create.
* The 3D version of Monster Truck, used in the above mock-up prototype, was generated by 3D AI Studio from my hand drawing.

Designing 3D objects can be an effective medium for children to realize that AI may not be the promising tool for creating the solutions we had expected. Unlike a 2D image, when you provide a single view of the object to AI, it does not always produce the form you envisioned. The generative AI is a black box in which we lack full control over what it delivers to us. In the generative 3D experience, students found that when only one view is given to the generative model, it can create an entirely different design for the side, back, or top views. Through this experience, students are encouraged to use their autonomy to modify the 3D character’s design.
The sketch on the left is a hand-drawing of a monster truck used to test whether the 3D AI Studio can generate 3D models at a level suitable for a STEAM project. Below is the result of the 3D model produced by the 3D AI Studio.
The inspirational story behind the project
About two decades ago, this Swedish design group, Front, challenged human autonomy in the design process. They questioned the norm with the concept of “design by something else.” They examined the boundary of why humans always have the autonomy to make everyday decisions and the extent to which humans can still play a significant role in the design process.
The Front Design Group demonstrated the autonomy and creativity that humans can still possess, even when other creatures are involved in the design process. Here is what they did:
A series of home decor designed by animals:
“Blow Away Vase” designed by algorithm:
The STEAM learning activity for Grades 4-6 students using KIDCAD
(For Considering User Journey Map)

The above image was generated using Flux 1.1 pro with the prompt: “Students are sitting in a futuristic maker space classroom, a teacher is asking them to draw a cartoon character to represent their school’s identity.”
Learning Goal:
- Students develop their agency in using AI properly.
- Students improve their visual-spatial intelligence.
- Students use design thinking for problem-solving to be more explorative and creative.
Learning Outcome
- Students used design thinking tools as a guide for their learning process.
- Students learned how to design a 3D character with spatial perception.
- Students engaged with the community to understand their identity.
A Feasible Learning activity in the future classroom with KIDCAD
Introduction of the STEAM activity: In Japan, there are over 1,000 mascots (Yuru-Chara) representing various regions, events, organizations, or businesses. The STEAM activity is designed for elementary schools in Japan; students will participate in an STEAM activity where they will create a mascot for a region, event, organization, or business. By the end of the activity, students will have made the 3D-printed character of their own design.
The STEAM learning experience integrated with Standford D-School design thinking methodology into the learning experience, allowing more creative and explorative student-centered learning while in a guiding framework for teachers to follow. In the learning process, teachers use questioning techniques to inspire students to explore different directions rather than just providing answers directly. The 3D modeling software KIDCAD will help students scaffold the creation of the 3D character.
Step 1: Empathy
The teacher assigns students to design a mascot that embodies the community’s identity. The students define the community as an open-ended topic, such as a region, an event, an organization, or an enterprise.
Students conduct interviews with the community to better understand the district’s values and stakeholders’ interests.
Step 2: Identify
The students identify the core identities, cultural values, and visual elements that represent the community from the user research.
Step 3: Ideation
Armed with these defined identities, students design their mascot to represent those values. Throughout this process, they gain valuable experience in 3D character design and develop a heightened sense of “spatial perception.”
Before the ideation process, students might think a front view of a character is already good enough to represent the whole form of a 3D character. This misconception might be based on their previous cognition of different AI-generated software. Therefore, the activity is designed to help them to unlearn misconceptions.
Students start their imagination by drawing the front view of the character. After the front view is created, students use clay/Play-Doh to create a physical figure of the mascot. Then, the teacher asked students to draw a side and back views of the character. The teacher teaches about the rules and ways to correctly draw the character to represent the side and back views.
After the students had attempted to draw their version of a side view and back view, the teacher demonstrated how one front-view image of the character could lead to very different results in the KIDCAD software. Through this experience, children develop a “sense” of not relying heavily on AI to create the solution but gaining autonomy in creating a genuine one.
The KIDCAD software allows students to have the autonomy to manipulate the AI-generated 3D model with a digital sculpting (clay/wax modeling) experience. Or they can draw markings on the 3D drawings to illustrate how they want the AI to modify the design. They could put a prompt like “The jawline of the turtle should follow this curve.” In the interaction, the generative AI may provide feedback that says, “There is no feasible solution with this curve,” which implies the student may have given a “contradicting” curve with the other drawing view. Therefore, this process helps develop their visual thinking ability.
The teacher may assess students’ ability to grasp visual-spatial thinking skills by examining the decline rate of the “contradicting” curve.
Step 4: Prototype
Once the 3D model is complete, students print it from the designated 3D printers in the school maker space. The KidCAD software has an intuitive user interface, making it easier for students to print their models without excessive teacher supervision.
Step 5: Testing
The students bring their 3D-printed models to the community and share their stories about creating the mascot. They also interview or interact with community members again to gauge their reactions and feedback on the character design.
connect: LinkedIn